
Italian Porchetta – Italy’s greatest dish?
By Lee Jackson ↣ Published on: January 25, 2021
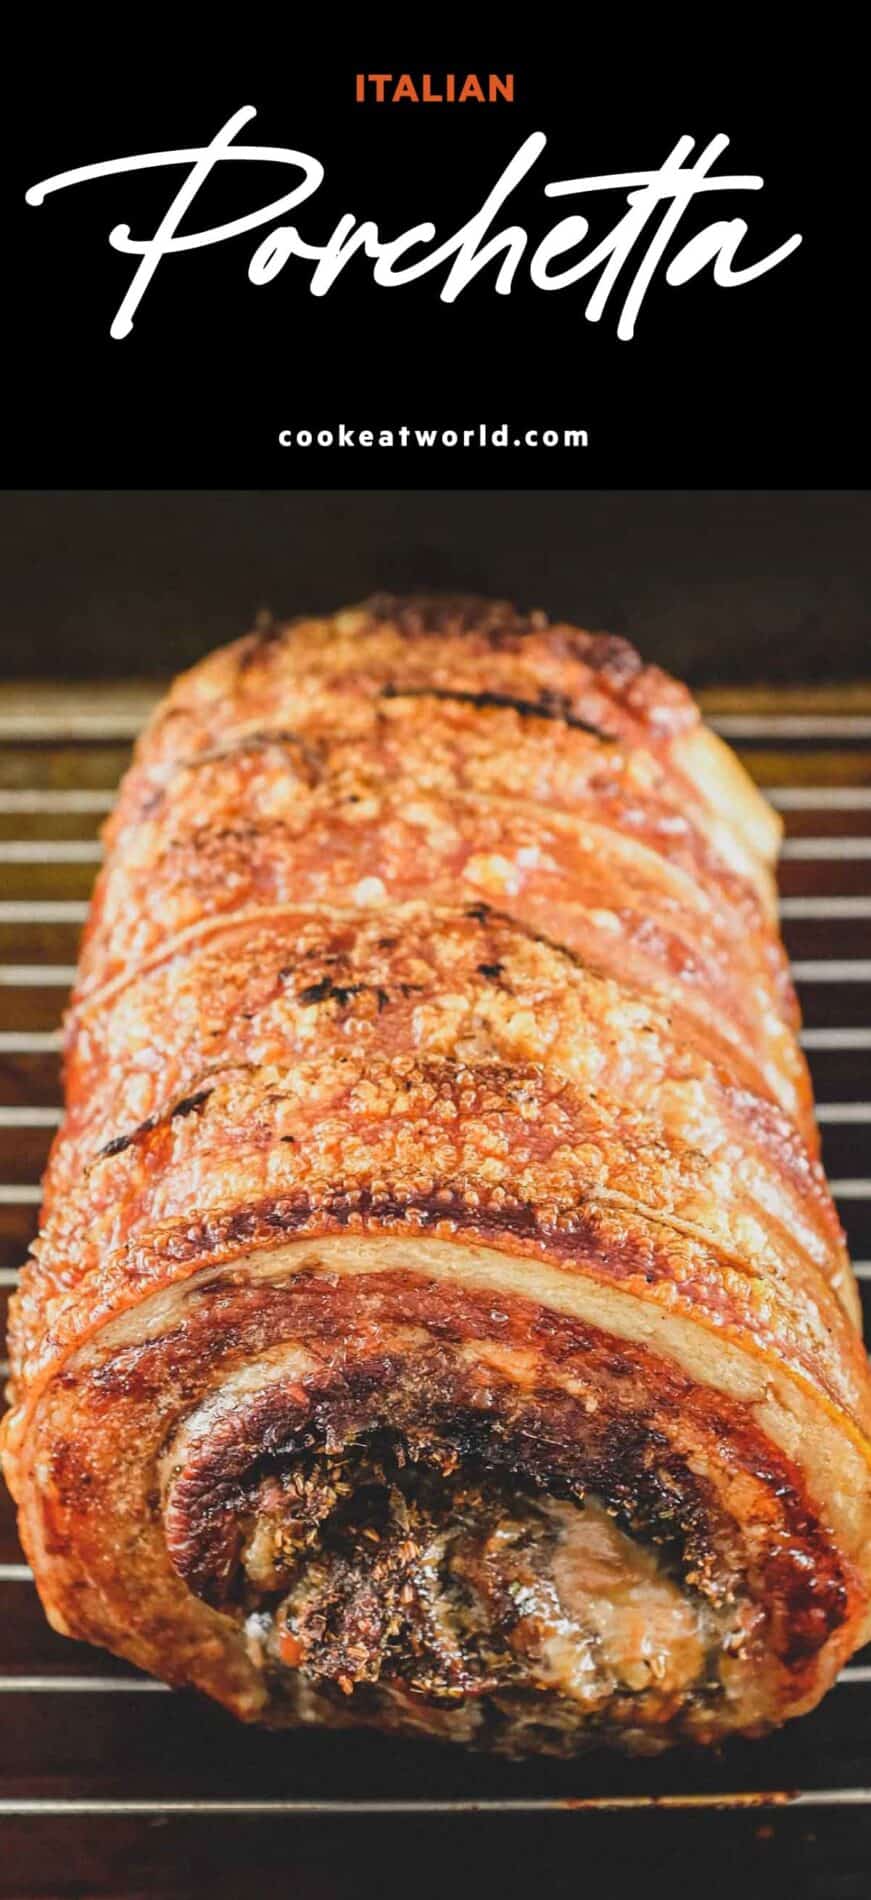
My Italian porchetta recipe is rolled pork belly, stuffed with fennel, garlic and herbs then slow-roasted to perfection with the crunchiest skin. It’s one of Italy’s most glorious dishes and so far beyond delicious that there isn’t yet a word to describe… in either language.

Italian Porchetta is in my opinion, one of the greatest Italian offerings. Pork, stuffed with herbs and garlic and slow-roasted to a thing of wonder. Porchetta originated in the Rome area but is now found all across Italy (and indeed the World). This recipe is part of my Italian and Meat Recipes from Around the World collections, where you’ll discover more fragrant favourites.
Traditionally a celebratory dish, but now very common as street food too. Many towns and villages have tiny shops or mobile vans dedicated to serving this and nothing else, a real destination! When in Italy, wherever I saw a sign, I was sold.
What's Ahead?

What is Porchetta?
Porchetta is slow roasted pork, flavoured with herbs and spices. Originating in Lazio, but now popular around all of Italy.
Porchetta can be made with a variety of pork cuts, and indeed the whole pig - the general idea is that the pork is stuffed with a combination of herbs and spices along with garlic (traditionally, offal was also used to stuff the meat).
The skin is left on so that it crisps up in the oven. Porchetta can be made in a wood-fired oven, a regular oven and also spit roast over a fire. A regular oven produces spectacular results.
Why it works?
Fennel! - The reason I personally love porchetta SO much is the soft pork is infused with my favourite Italian flavouring, fennel seeds. No other spice delivers a quintessentially Italian flavour - a sweet anise infusion. I can't get enough.
Low and slow - the slow roasting of porchetta creates the juiciest, and meltingly tender texture to the pork.

Stuff You'll Need
There are a couple of essentials for the best tasting porchetta. Nothing too hard to find so let's break it down.
- Pork - you can use many cuts of pork for porchetta. I like to use pork belly as it has plenty of fat to ensure the meat stays juicy and soft. Be sure to buy your belly with the outer skin layer still on. This will produce the crunchy outer layer.
- Fennel - An essential ingredient to porchetta. It's not truly porchetta without fennel seeds.
- Garlic - the stuffing also features garlic to infuse the meat with more flavour.
- Seasonings - Black pepper, fresh sage and rosemary round off the flavour and create more herbaceous notes through the meat.


Step by Step
There's nothing difficult about creating your own porchetta at home. Here's how it's done by the home cook.
- Step 1 - Making the porchetta stuffing: We start with the essential flavourings to any porchetta recipe - fennel! Fennel and pork are a marriage made in heaven, and nothing says Italy more than the taste of fennel. To stuff the meat we're using a combination of fennel seeds, black pepper, garlic, salt, sage and rosemary. We first toast the fennel seeds and pepper in a dry frying pan, then using a pestle & mortar or spice grinder, grind the seeds into a rough powder. We mix this with the salt, finely chopped sage and rosemary and some minced garlic. This crumbly mixture becomes our stuffing.
- Step 2 - Preparing the meat: Using a sharp knife, we cut a shallow criss-cross over both the skin and then the meat side of the pork belly. We then sprinkle generously with the stuffing and massage into the meat side. This will ensure maximum flavour when cooked.
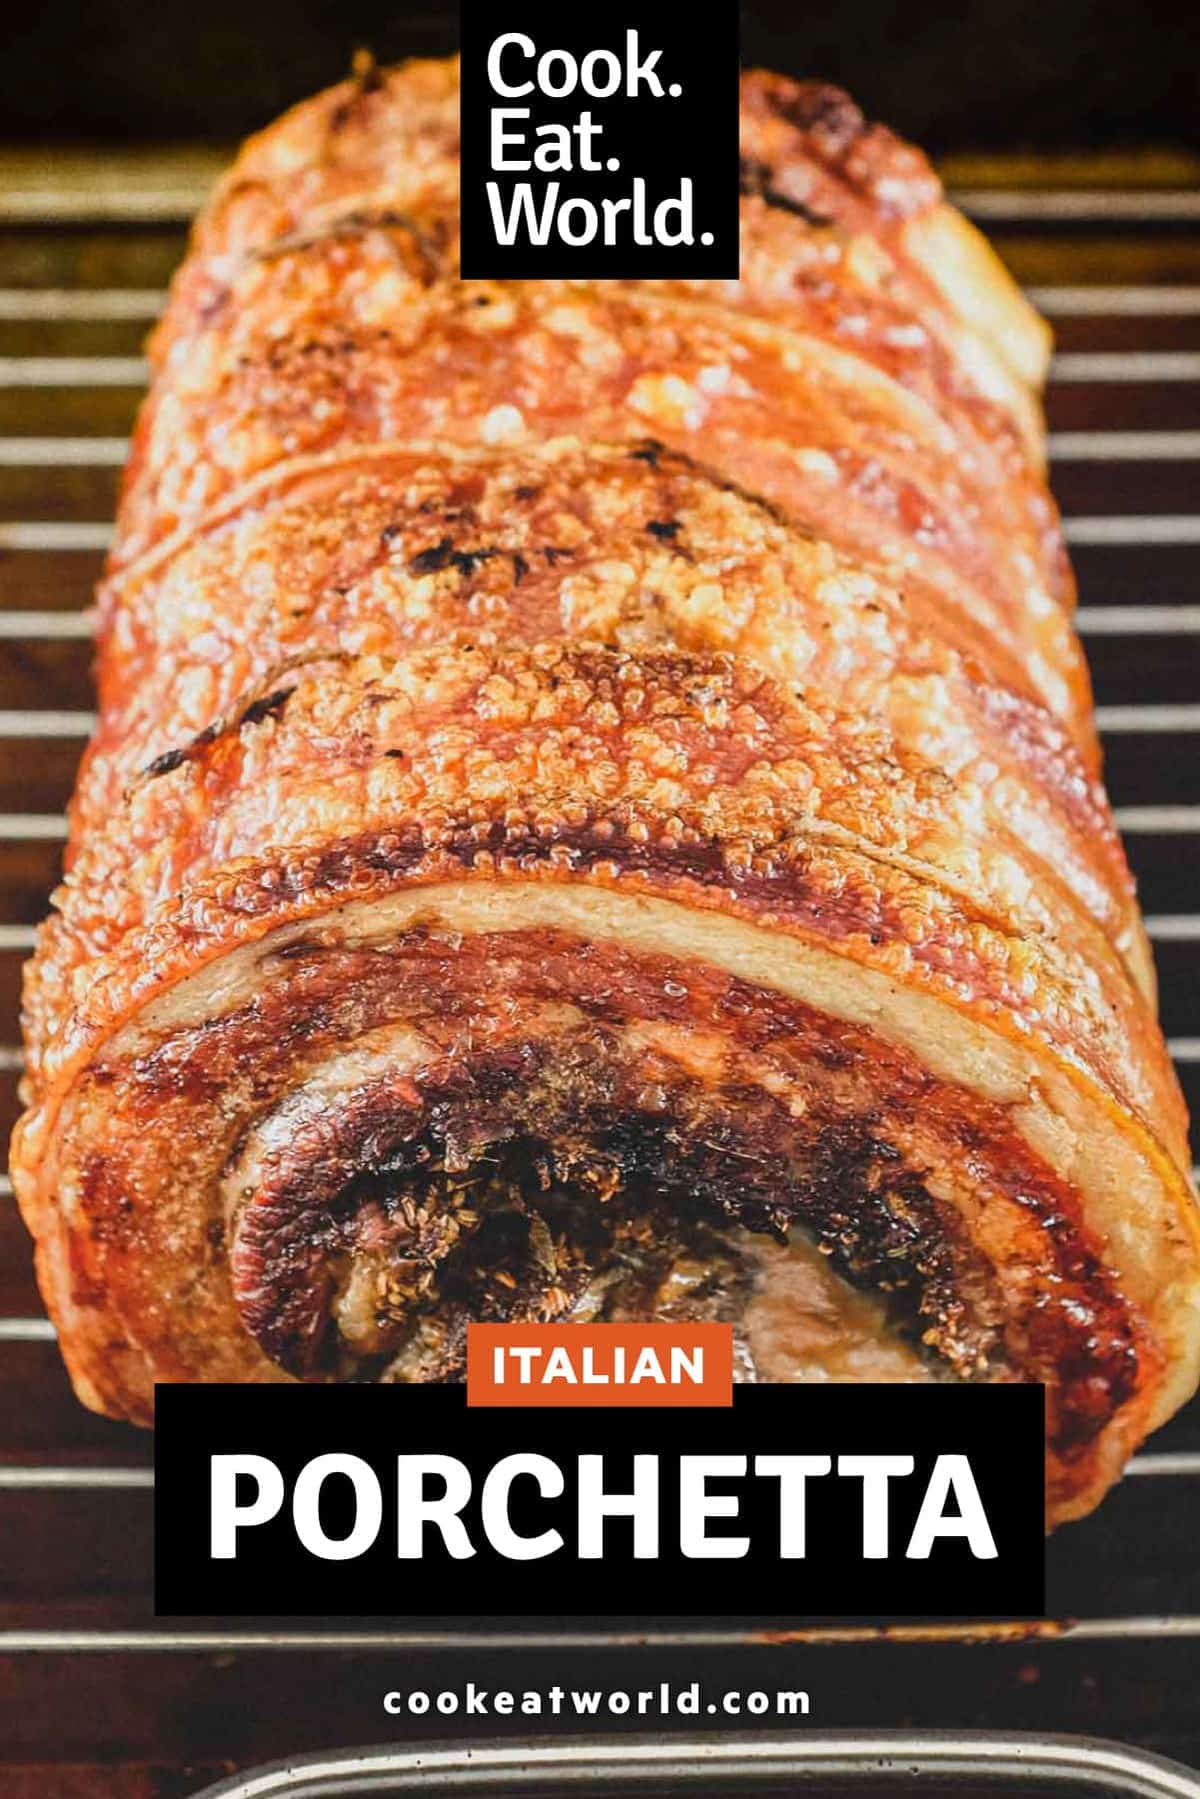
- Step 3 - Rolling and roasting: Now we take the meat and roll it into a sausage lengthways (the longest edge). We place the seam at the bottom and using kitchen string we tie the meat at small intervals to secure. Get it as tight as you can so that the pork keeps a good shape when cooking. This is easier than it sounds by the way! I also like to stab the skin around 20-30 times with a sharp knife. This will help with crisping up later. Then it's into a preheated oven at a low temperature of (300ºF/150ºC) on a rack in a roasting tin. I like to add a couple of cups of water (or white wine) to the roasting tin. This helps keep the meat moist during cooking. I normally top it up halfway too. This meat is in the oven for a long time... 4 hours to be precise. It's worth the wait, trust me.
- Step 4 - Crisping the skin: Now, any porchetta is only as good as it's crunchy skin. It's essential that you get a good 'crackling' (as we call it in England). My technique is pretty much failsafe. The key to a good crunch is achieved right at the beginning. Ensure that your pork skin is DRY before it goes in the oven. I like to sit the skin on paper towels for a while to soak as much moisture. Sprinkle a little salt over the skin before cooking too.

Creating the crispiest skin for porchetta
- The key to getting the real crunch is to crank up the heat after 4 hours. I'll turn up the oven to 450ºC/230ºC and watch the meat like a hawk! (It can burn quickly). I'll take a quick peek every 20-30 seconds to make sure it's not burning for about 5-10 minutes. The skin suddenly bubbles and crisps like magic under that temperature. Give it a little tap with a knife to hear how crisp it is. It's the best way I've found of creating an excellent crunch.
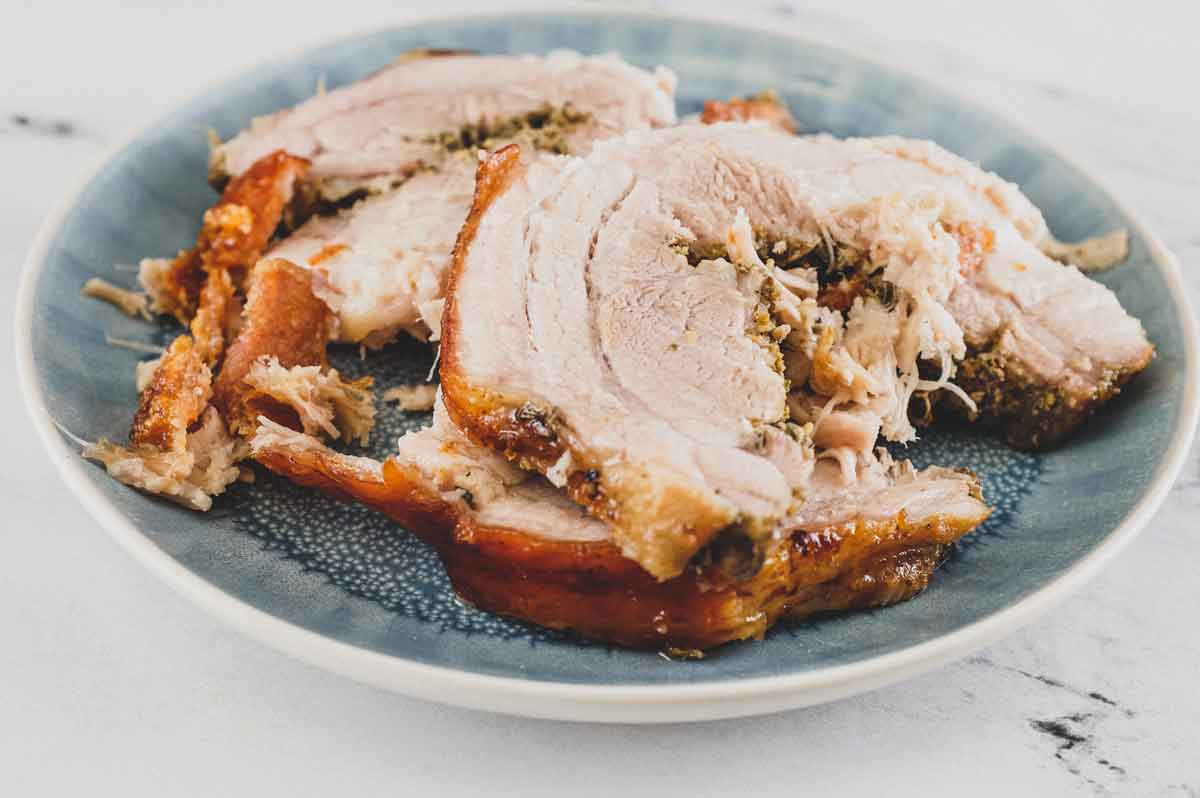
- Let the meat rest loosely under foil for about 30 minutes - the juices will settle and the meat becomes even more soft and tender. Then, simply remove the strings and get slicing. Thick or thin, it's your call. TOP TIP: Use a serrated knife (like a bread knife) to saw through the crisp skin, it's way less treacherous!

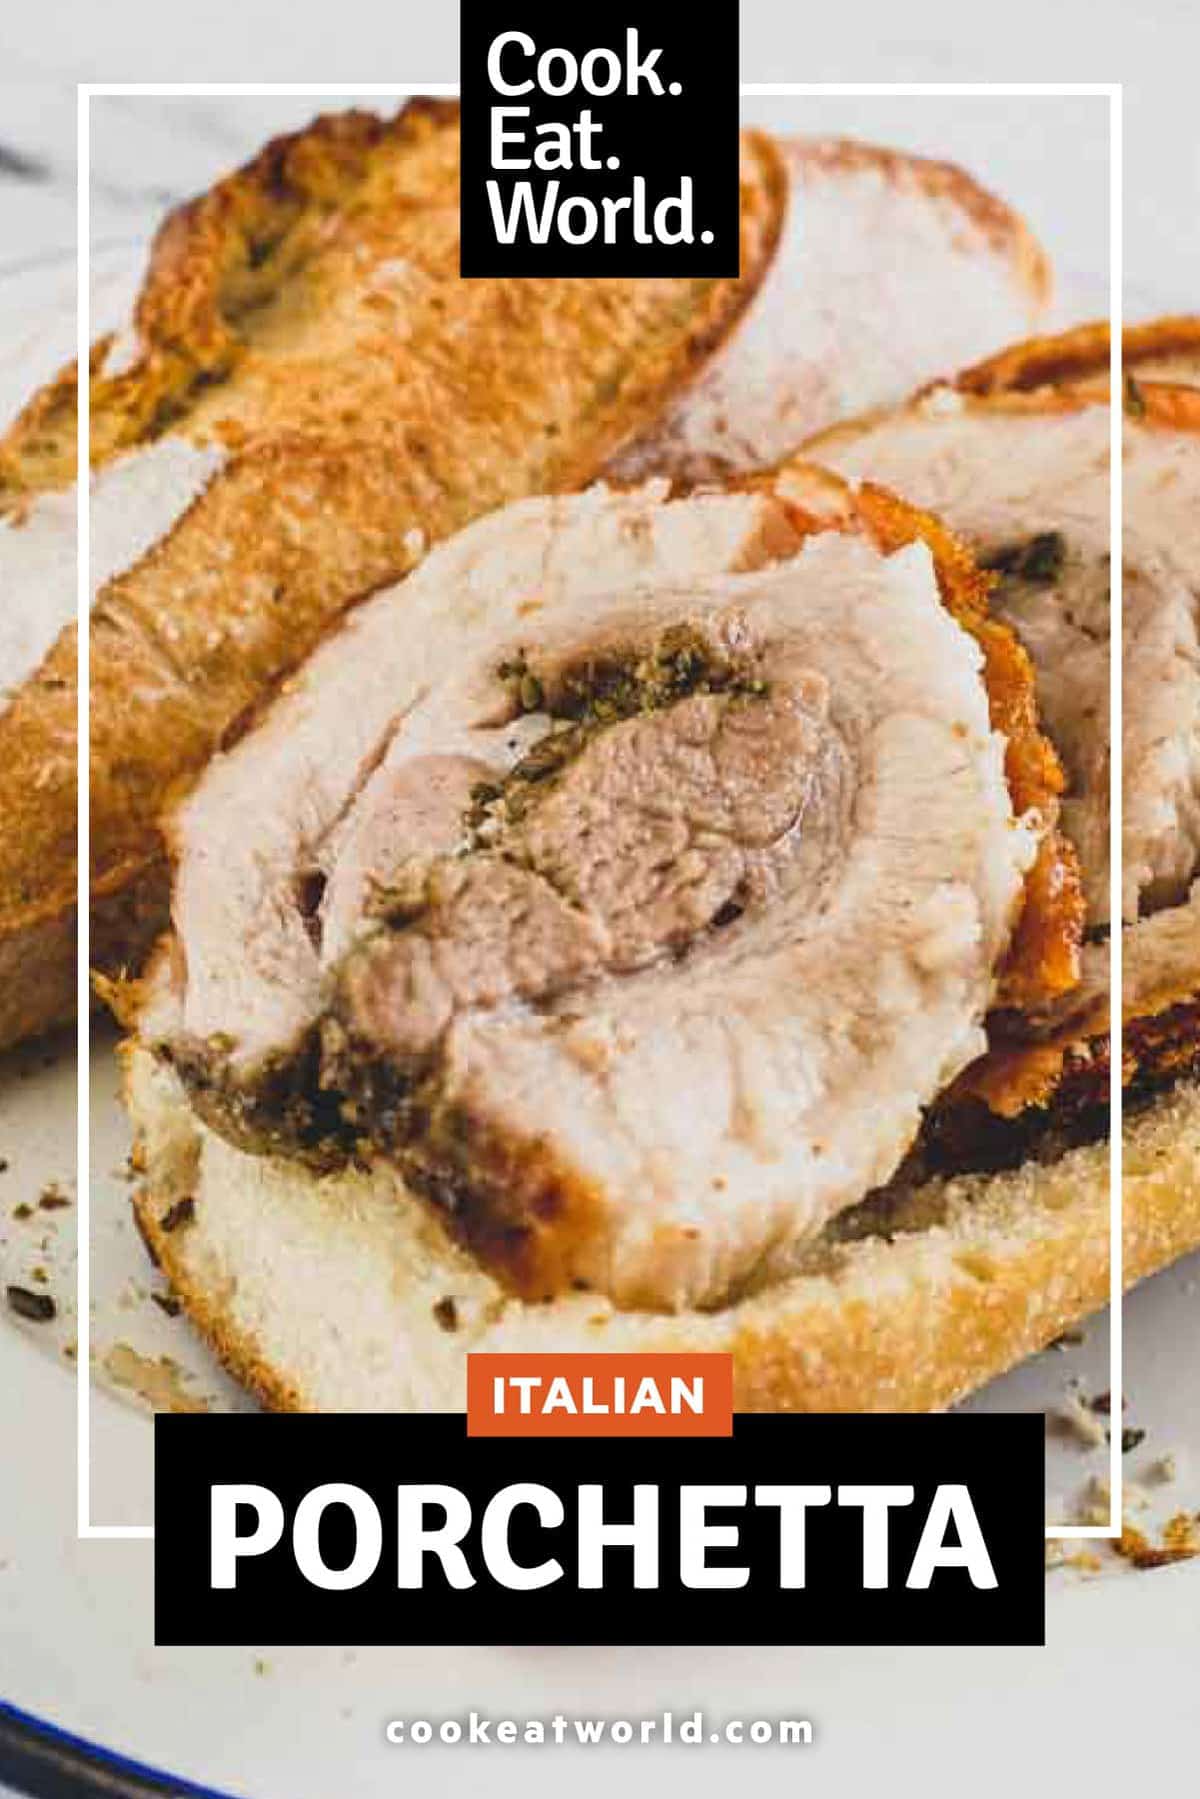
The perfect porchetta sandwich
Italians KNOW not to mess with a good thing, and porchetta is most often served as a sandwich, nothing else but bread and porchetta - sometimes they'll slather on some pickles or antipasti vegetables, but I prefer it without anything.
On its own, it's as close to food perfection as it gets. The meat is meltingly soft (the fat content in a pork belly keeps the meat juicy and tender). But the real winning element is the note of fennel and herbs which permeate every bite - seasoned for the gods! The pops of crunchy skin combined with the soft meat and chewy bread is another level of delight! I could go on... but really, you just need to experience it for yourself.
You can, of course serve porchetta any way you like; with salad or vegetables, but it's the sandwich I love the most.
Storage suggestions
Once cooked, porchetta will be good in the fridge for 4-5 days, tightly wrapped. You'll lose most of the crunch from the skin when refrigerated, so for the prime crunch experience, serve right away. Leftover meat is excellent for sandwiches.
Personally, I don't recommend freezing roasted porchetta. You could freeze the pre-roasted meat before cooking. Just wrap it tightly in plastic wrap and freeze for 3+ months. Defrost thoroughly (in the fridge) before roasting.

Ready to get cooking?
Once you discover the joys of Italian porchetta you'll be fully on board with cooking it yourself at home. It's simple and very effective! It delivers the most amazing aroma when roasting - and it'll transport you to Italy by smell alone. There's a reason THIS is one of my most favourite dishes in the world. I'll let YOU find out why if you don't already know... hope you enjoy!
More Italian recipes
If you liked my Porchetta recipe, I'm sure you'll love some more of my favourite Italian recipes.
- Taralli Pugliesi
- Osso Buco Ravioli
- Fennel & Orange Salad
- Pasta Alla Gricia (Pasta with Guanciale & Pecorino Romano)
- Pasta with Salami
- Foglie D’Ulivo with Pancetta & Olives
- Pulled Lamb with Nduja and Borlotti Beans
- Mezzelune Pasta with Cavolo Nero & Ricotta
- Pasta with Sausage Ragù
- Spaghetti with Cavolo Nero & Almonds
- Pinsa Romana

Any Questions? (FAQ)
Have a question about Porchetta? Let me know in the comments.
What is Italian Porchetta?
Porchetta is a traditional Italian dish made by stuffing a whole deboned pig with herbs, garlic, and spices, then roasting it until the skin becomes crispy and the meat tender. It's a flavorful combination of juicy meat and aromatic seasonings.
How is Porchetta served?
Typically, Porchetta is sliced thinly and served in sandwiches or as a main dish. The crispy skin and tender meat are often accompanied by bread, sometimes with condiments like herb sauces or grilled vegetables, enhancing its savoury flavours.
What makes Porchetta special?
The uniqueness of Porchetta lies in its preparation and seasoning. The meat is rolled and slow-roasted, allowing the flavours from the herbs, garlic, and spices (namely fennel seeds) to infuse the entire dish. The crispy skin contrasts beautifully with the succulent, seasoned meat.
This recipe uses affiliations and may receive a commission based on your activity (link clicks). Learn more.
Ingredients
- 6 lb pork belly (3kg) (skin on)
- 3 tbsp fennel seeds
- 1 tbsp black peppercorns
- 2 tsp kosher or sea salt (or 1 tsp regular salt)
- 2 tbsp sage (finely chopped)
- 2 tbsp rosemary (finely chopped)
- 8 garlic cloves (peeled and finely chopped)
Instructions
- Using paper towels, wipe the pork belly to get it as dry as possible. Wrap the entire belly in towels and leave for an hour to soak up more moisture.
- Preheat oven to 300ºF/150ºC
- In a dry frying pan, roast the fennel seeds and peppercorns until they start to jump around the pan a little. Pour into a pestle & mortar or spice grinder and grind into a rough powder, like breadcrumbs. You can also finely chop using a large knife.
- Combine the fennel mix with the salt, sage, rosemary and garlic.
- Place the pork, skin up and using a sharp knife score the skin. Then turn over and make a shallow criss-cross pattern on the surface of the meat.
- Sprinkle over all the fennel mix and massage into the meat.
- Along the long edge, roll the meat into a long sausage. Place the seam edge on the bottom, and using string slide under the rolled pork and tie at 2-inch intervals to secure the porchetta roll. Gently stab or prick the skin with a sharp knife all over, this will help crisp it later.
- Place the porchetta roll onto a rack in a roasting tin so that it's not touching the surface. Pour in around 2-3 cups of water. You can also use white wine if you like. Sprinkle over a little salt.
- Roast in the oven for 4 hours. After about 2 hours, top up the water in the pan.
- You can also baste the pork a few times after around 2-3 hours.
- After 4 hours, crank up the heat to 450ºF/230ºC and keep a keen eye on the pork. Check every 30 seconds or so to ensure the skin is not burning.Tap the skin with a knife to see how crisp it's getting and remove when you're happy with the crispness. You should see blistering and bubbling between 5-10 minutes. I can't stress enough, to keep an eye on the pork as it'll burn quickly!
- Cover loosely with foil and rest for 20-30 minutes.
- When ready, slice the pork and serve.
- Serve on its own as a sandwich, or as part of a larger Italian feast.
Do you think I can cook this a day or two in advance? Thinking of having this on Christmas Day but as another option to the 50 million other things I’m cooking, lol.
Hi There,
Yes, you can make a couple of days in advance. Just wrap tightly in foil and refrigerate. On the day, remove until at room temp, then reheat (covered) in an oven 160ºC/320ºF until hot through (30-40 mins). Uncover and raise the temp to 220ºC/425ºF and re-crisp the skin (about 10-15 mins – keep an eye on it).
Hope this helps!
Hello Lee,
I recently acquired a sous-vide circulator. As an inveterate experimenter …I’m wondering whether this recipe is suitable for sous-vide, and if so what mods (if any) it might need in order to use it for a family gathering on Boxing Day, and what to do in what order – perhaps preliminary sous-vide overnight from Christmas Day, then adding herbs later before finishing off in the oven – or perhaps starting with herbs initially to get greatest additional flavour hit?
Your views appreciated, with thanks,
Peter in Cambs,UK
Interesting question. I’m afraid I have no experience with sous vide. I’m presuming you would crisp up after the initial cook? If so I think you should sous vide with the herbs for max flavour. Other than that I’m in the dark! Sorry I can’t be more helpful…
Good luck and let me know how you go.
Lee
Recipe so far is great. Might have added a few extras. It’s currently in the oven but smelling gorgeous!
Hope it’s as delicious as it smells…
Thanks
Lee
Do I put a lid on for the 4 hour roast?
No need for a lid, leave uncovered.
Thanks,
I was reflecting on what to do with a pork belly and it seemed to this old and late learner cook that a porchetta style might work and was surprised that others had gone on before. The recipe was worked perfectly. I aimed at 82C before pushing the oven temp up to crackle the skin. A good crackle was achieved at core temp of 88C. A foil cover to reduce dehydration instead of the pan water worked well. Your herbs were fantastic.
Thanks so much, herby porchetta is just perfect when it has that crunch of skin with soft, melty pork. Glad yours worked well. Thanks for the feedback.
Tried a few recipes since falling in love with Porchetta on a stay in Umbria. This is hands down the best and easiest to follow, with consistent results. Thank you!
Thank you so much – I just can’t get enough porchetta in my life – this comment has inspired me to make some tonight! Thanks for that! Glad you enjoyed and appreciated and thanks for sharing.
As a home cook, I found this easy with lots of great ingredients. I studied at the FRENCH CULINARY INSTITUTE. in NY.
I learned cooking and the most important part what MIS-En-Place. Gather everything you need and get ready.
EVERYTHING! Salt, Pepper, “PASTE”, String, preheat oven, get out pan with oil (GRAPESEED oil is the best-High Smoke point, brown on all sides before putting in oven, Use a Meat thermometer to check for doneness.
I put my roast on a grill pan and elevate above a bit of water. About 1/4 inch. Keeps it moist
Remove from oven and let rest 15-20 inches. This allows the juices to return inside pork.
Thankyou for the comment. I agree mis-en-place is the most important part of any dish! I hate a chaotic kitchen. Glad you enjoyed the porchetta!
Trying this tomorrow! Looks great! Do you think I can cook it in my traeger instead of the oven?!
I’m not sure. You need to be able to have the temperature low and then high at the end to crisp the skin. If you’re able to do this then you may well be able. You could always finish it off in a hot oven I guess. Let me know how you go. Thanks!
I am very impressed at how easy and effective this recipe is. I must admit I was a little sceptical as I’m a big fan of porchetta in Italy. While it’s not as magical as the type you find in Rome it’s a close second. And the pork skin was crisp beyond my wildest dreams! FIVE STARS!
I’ll take a close second thankyou! Glad you enjoyed.
Such a good recipe! I made this last week and my family haven’t stopped talking about it. It turned out great and the skin was crunchy and delicious.
So glad you enjoyed! Thanks for the comment. Be sure to cook it again!
Can I make this a day or 2 in advance, wrap the exposed ends with cling wrap and leave it totally assembled in the fridge for 2 days allowing the skin to dry further?
Absolutely. If you are doing that I would ensure the skin is well scored to ensure it doesn’t harden and not crispen as well in the oven. That said, I would just cover the whole thing in plastic and wipe any excess moisture off an hour or so before cooking.
I cooked this for Boxing Day and it was delicious. I added more herbs than the recipe calls for and put a splash of sherry in the pan instead if wine which smelled great. The skin didn’t crisp right away but I just left it in the oven and then suddenly it puffed up and was perfect. It probably took 20 minutes instead of 10. Thankyou for the recipe.
Boxing day! A fellow Brit (or Aussie)? Glad you enjoyed – it’s a winner. Thanks for the comment.